Luscious Lemon Coconut Cream Pie – Sunshine in Every Slice
If sunshine had a flavor, it would taste exactly like this Lemon Coconut Cream Pie. Bright, tart lemon meets sweet, tropical coconut in a silky-smooth cream filling that’s light yet indulgent, refreshing yet comforting. This pie is pure happiness on a plate—perfect for warm afternoons, Sunday dinners, holidays, or anytime you need a cheerful, nostalgic dessert.
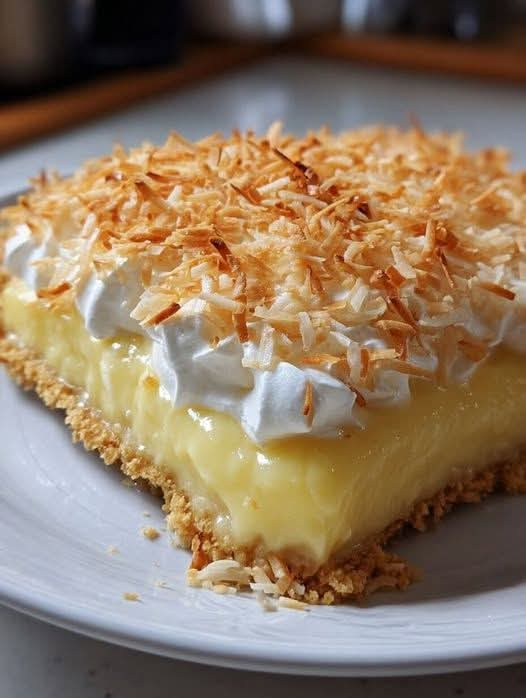
This recipe feels like a treasured classic straight from grandma’s kitchen: a crisp pie crust, a creamy citrus filling, and the irresistible aroma of toasted coconut filling the air. Timeless, elegant, and surprisingly simple to make, this pie is guaranteed to impress.
Ingredients & Why They Matter
- Pre-Baked Pie Crust (9-inch) – A crisp, sturdy base that perfectly balances the creamy filling.
- Granulated Sugar – Sweetens the custard and balances the tart lemon flavor.
- Cornstarch – Essential for thickening the filling to that classic cream pie texture.
- Salt – Enhances flavor and prevents the pie from tasting overly sweet.
- Whole Milk – Creates a smooth, creamy custard base.
- Coconut Milk – Adds richness and a subtle tropical flavor that complements the lemon.
- Egg Yolks – Provide structure, richness, and that luxurious custard mouthfeel.
- Fresh Lemon Juice – Brings bright, vibrant citrus flavor.
- Lemon Zest – Intensifies the lemon aroma and taste.
- Unsalted Butter – Adds silkiness and depth to the filling.
- Vanilla Extract – Rounds out the flavors with warmth.
- Sweetened Shredded Coconut – Toasted for garnish, adding texture and nutty sweetness.
How to Make Lemon Coconut Cream Pie (Step-by-Step)
- Make the Base Mixture: In a medium saucepan, whisk together sugar, cornstarch, and salt. Gradually whisk in the whole milk and coconut milk until smooth. Cook over medium heat, stirring constantly, until the mixture thickens and begins to bubble.
- Temper the Eggs: In a separate bowl, beat the egg yolks. Slowly whisk in a small amount of the hot mixture to warm the yolks. Gradually return the yolks to the saucepan, stirring continuously. Cook for an additional 2 minutes.
- Finish the Filling: Remove the saucepan from heat. Stir in lemon juice, lemon zest, butter, and vanilla extract until fully combined and silky smooth.
- Assemble the Pie: Pour the warm filling into the pre-baked pie crust. Smooth the top evenly.
- Chill to Set: Refrigerate the pie for at least 4 hours, or until fully set.
- Toast the Coconut: Preheat the oven to 350°F (175°C). Spread shredded coconut on a baking sheet and toast for 5–7 minutes, stirring occasionally, until golden. Let cool completely.
- Garnish & Serve: Sprinkle toasted coconut over the chilled pie. Slice and serve cold.
Why This Lemon Coconut Cream Pie Is So Loved
This lemon coconut cream pie is beloved because it strikes the perfect balance between tangy citrus and sweet, creamy coconut. It’s light enough to enjoy after a big meal, yet rich enough to feel truly indulgent. The textures—crisp crust, creamy filling, and crunchy toasted coconut—make every bite unforgettable.
Pro Tips for the Perfect Cream Pie
- Whisk constantly while cooking to prevent lumps.
- Use fresh lemon juice and zest for the brightest flavor.
- Chill thoroughly to ensure clean, beautiful slices.
- Toast coconut carefully—it can go from golden to burnt quickly.
Serving Suggestions
Serve your Lemon Coconut Cream Pie with:
- A dollop of freshly whipped cream
- Extra toasted coconut on top
- Fresh berries for a pop of color
- A cup of tea or coffee for the perfect finish
Final Thoughts
This Luscious Lemon Coconut Cream Pie is everything a dessert should be—bright, creamy, nostalgic, and irresistibly delicious. With simple ingredients and classic technique, it delivers bakery-quality results right at home. Whether you’re making it for family, guests, or just yourself, this pie is guaranteed to bring smiles and sunshine to the table. One slice is never enough.