Cherry Pie Bars
These Cherry Pie Bars deliver all the comforting flavors of a classic homemade cherry pie—without the hassle of rolling dough.
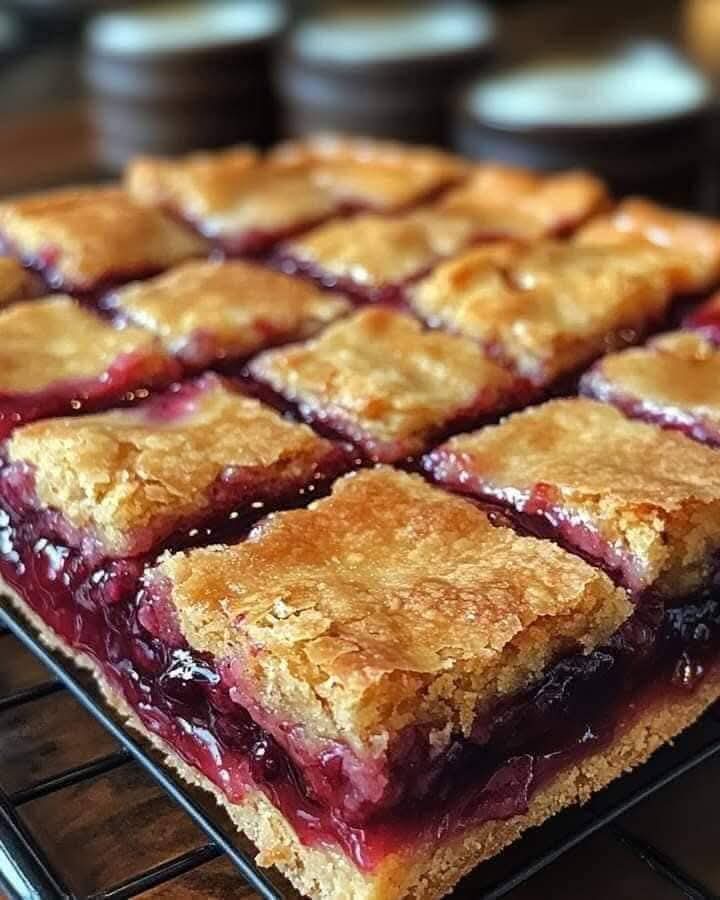
Soft, buttery layers cradle a generous amount of luscious cherry filling, while a sweet almond-vanilla glaze finishes everything with the perfect shine.
Ideal for holidays, potlucks, bake sales, family gatherings, or dessert platters, these bars slice beautifully and travel even better.
Whether you enjoy them warm with vanilla ice cream or cooled to room temperature, these cherry bars bring nostalgic flavor in a simple,
elegant format that anyone can make. This long-form recipe includes step-by-step instructions for flawless results every time.
Ingredients
For the Crust
- 1 cup butter, softened to room temperature
- 2 cups granulated sugar
- 4 large eggs
- 1 teaspoon vanilla extract
- 1/4 teaspoon almond extract
- 3 cups all-purpose flour
- 1 teaspoon salt
For the Filling
- 2 cans (21 oz each) cherry pie filling
For the Glaze
- 1 cup powdered sugar
- 1/2 teaspoon vanilla extract
- 1/2 teaspoon almond extract
- 2 tablespoons milk (add more for thinner consistency)
Preparation Instructions
Step 1 – Preheat & Prepare the Pan
Preheat your oven to 350°F (175°C). Grease a 15x10x1-inch baking pan with butter or nonstick spray.
For easy removal, line the pan with parchment paper and let the edges hang over the sides.
Step 2 – Make the Crust Batter
In a large mixing bowl, beat the softened butter and granulated sugar together until light and fluffy. This step is crucial,
as it creates the soft, cake-like texture of the crust. Add the eggs one at a time, mixing well after each addition.
Stir in the vanilla and almond extracts, then gradually add the flour and salt. Mix just until combined to avoid overworking the batter.
Step 3 – Assemble the Base Layer
Spread about two-thirds of the batter evenly into the bottom of your prepared baking pan.
The batter will be thick—use a spatula to smooth it out into an even layer.
Step 4 – Add the Cherry Filling
Spoon both cans of cherry pie filling evenly over the crust, spreading carefully so the fruit is distributed across the entire pan.
Step 5 – Add the Top Batter
Drop the remaining batter over the cherry filling in small spoonfuls. It does not need to cover the surface completely;
the cherry filling should peek through the gaps as it bakes.
Step 6 – Bake
Place the pan in the oven and bake for 30–35 minutes, or until the top is lightly golden and the edges begin to pull away from the pan.
Remove from the oven and allow the bars to cool completely before glazing. Cooling helps the bars set for clean slicing.
Make the Almond Glaze
In a medium bowl, whisk together:
- 1 cup powdered sugar
- 1/2 teaspoon vanilla extract
- 1/2 teaspoon almond extract
- 2 tablespoons milk
Adjust the milk as needed until the glaze reaches a smooth, pourable consistency. Drizzle the glaze evenly over the cooled bars.
🍽️ Serving & Storing
- Let the glaze set for 10–15 minutes before slicing into squares or bars.
- Store leftovers in an airtight container at room temperature for 2–3 days.
- Refrigerate for longer freshness—up to 5 days.
- Bars may also be frozen for up to 2 months.
Serve with whipped cream or warm with a scoop of vanilla ice cream for the ultimate cherry dessert!
Enjoy Every Bite!
These Cherry Pie Bars bring the joy of homemade pie in an easier, shareable form. Perfect for every celebration—and especially irresistible during the holidays.