Here’s a full, expanded write-up of your Pineapple Dream Dessert with everything you asked for—introduction, ingredients, instructions, methods, history, formation, conclusion, and even a little love for dessert lovers. 🍍✨
Pineapple Dream Dessert
Introduction
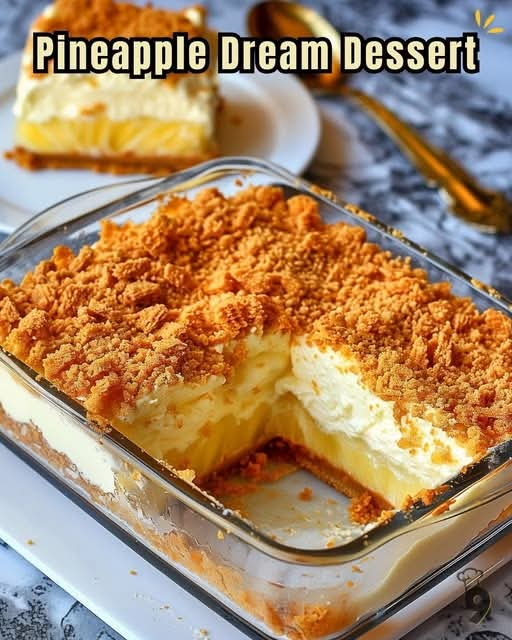
The Pineapple Dream Dessert is a classic no-fuss treat that has been gracing family gatherings, potlucks, and summer tables for decades. Sweet, creamy, and refreshing, this dessert combines the tropical brightness of pineapple with the comfort of a graham cracker crust. It’s one of those nostalgic recipes passed down from grandmothers to grandchildren, often scribbled on recipe cards with the words “Don’t Lose This Recipe!” circled for emphasis. Light yet indulgent, it’s the perfect “make-ahead” dessert for busy hosts and a favorite among pineapple lovers.
Ingredients
For the Crust
- 2½ cups graham cracker crumbs
- ½ cup unsalted butter, melted
For the Filling & Topping
- 2 cups powdered sugar
- ½ cup unsalted butter, softened
- ½ cup cream cheese, softened
- 1 cup Cool Whip (or homemade whipped cream)
- 1 large can (2½ cups) crushed pineapple, well drained
Instructions
- Prepare the Crust
- Preheat oven to 300°F (148°C).
- In a bowl, mix graham cracker crumbs with melted butter until well combined.
- Press about 2 cups of this mixture firmly into the bottom of a greased 9×9-inch baking dish.
- Bake for 8–10 minutes, then let it cool completely.
- Make the Cream Cheese Layer
- In a large mixing bowl, beat the softened butter and cream cheese until creamy.
- Gradually add powdered sugar and continue mixing until smooth and fluffy.
- Spread this cream mixture evenly over the cooled crust.
- Make the Pineapple Dream Layer
- In a separate bowl, fold the drained crushed pineapple into the Cool Whip.
- Spread this pineapple-whipped topping over the cream cheese layer.
- Add Final Touches
- Sprinkle the remaining graham cracker mixture evenly over the top.
- Cover and refrigerate for at least 4 hours (or overnight for best results).
- Serve & Enjoy
- Slice into squares and serve chilled.
- Garnish with extra pineapple chunks, whipped cream, or a cherry on top if you’re feeling fancy!
Methods
- Mixing Method: Creaming butter and cream cheese creates a light, fluffy texture for the filling.
- Layering Method: Each layer is carefully spread, creating distinct textures—crunchy crust, creamy middle, fluffy pineapple topping.
- Chilling Method: Refrigeration allows the layers to set, ensuring clean slices and a perfectly balanced bite.
History
The Pineapple Dream Dessert can be traced back to mid-20th-century America, when canned pineapple became widely available thanks to the Dole company’s influence. This dessert gained popularity in church cookbooks and potluck gatherings during the 1960s–1970s, when “icebox desserts” (no-bake or chilled treats) became a household staple. Over time, it became a beloved “retro recipe,” often shared in family circles with the loving note: “Don’t lose this recipe!”
Formation
This dessert is formed in three layers:
- Crust – buttery graham cracker base, slightly baked for firmness.
- Cream Cheese Filling – sweet, rich, and smooth, balancing the tartness of pineapple.
- Pineapple Dream Topping – light, fluffy, tropical, crowned with a sprinkle of crumbs.
The result is a dessert that is creamy, crunchy, and fruity all in one bite.
Conclusion
The Pineapple Dream Dessert is proof that simplicity often leads to perfection. With just a handful of ingredients and minimal effort, you get a refreshing treat that never fails to impress. Whether served at a summer picnic, a family reunion, or simply as a sweet escape after dinner, this dessert delivers smiles and second helpings every time.
For the Lovers 💛
This recipe is for pineapple lovers, cream cheese fans, and dessert dreamers everywhere. It’s for those who cherish retro recipes and the comfort of flavors that remind them of childhood kitchens. Share it with your loved ones, write it in your family recipe book, and remember—Don’t lose this recipe!
Would you like me to also create a no-bake version (skipping the crust baking step) so it’s even faster for hot days, or keep it in the classic baked-crust style?