Here’s a full, expanded recipe write-up for Fluffy Japanese Cheesecake in the long style you like — with introduction, history, ingredients, methods, instructions, formation, conclusion, and even “lovers” notes.
🍰 Fluffy Japanese Cheesecake
Introduction
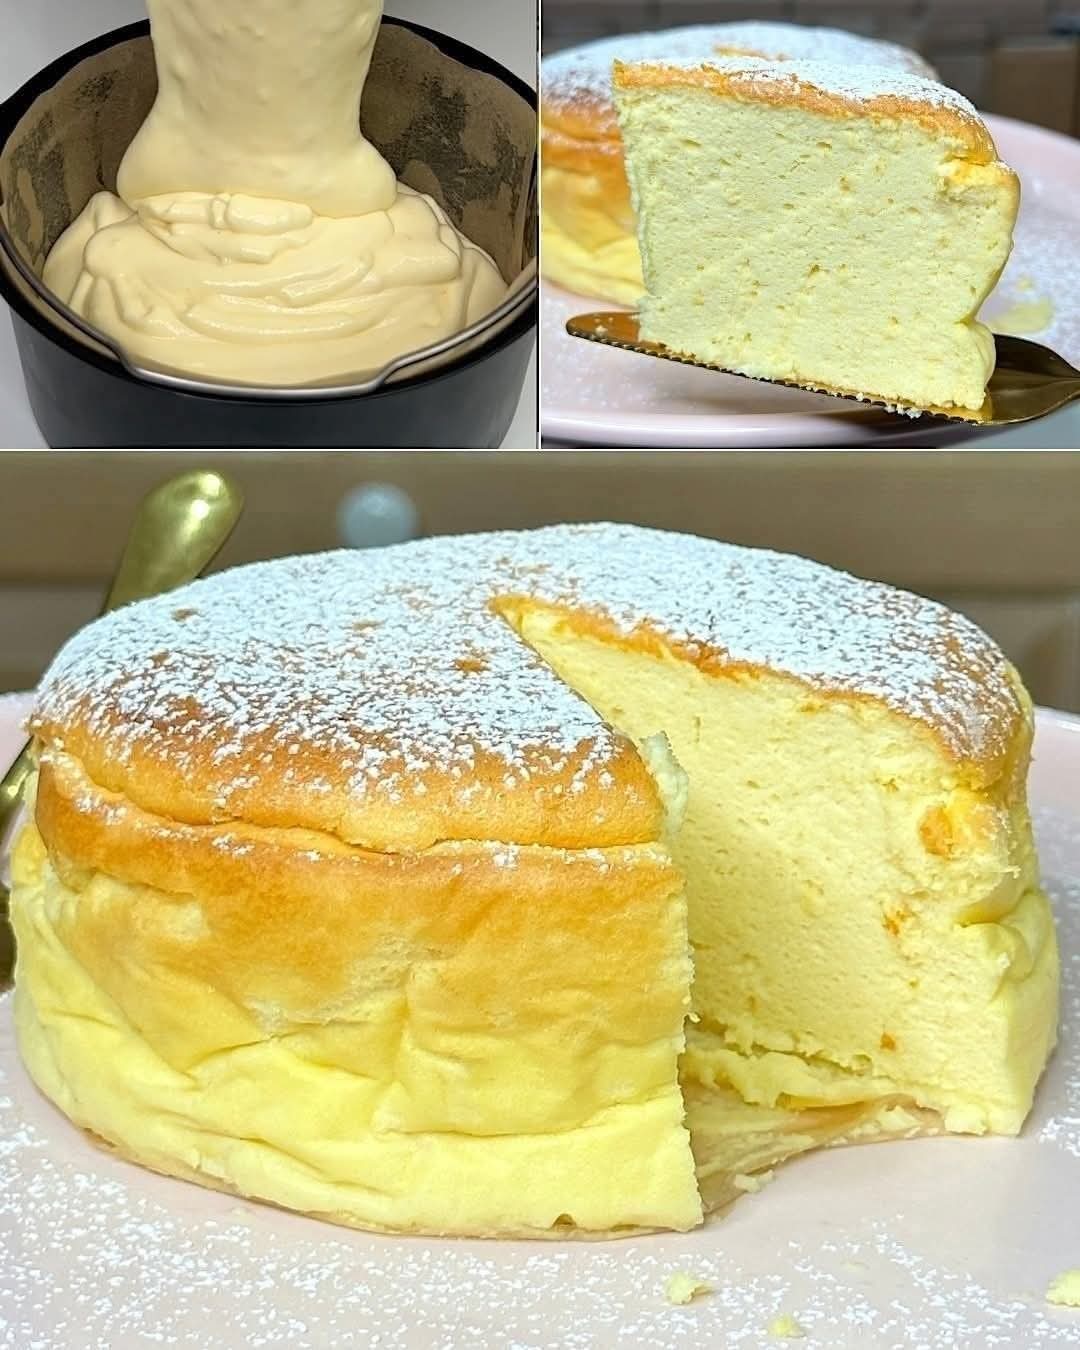
Fluffy Japanese Cheesecake, also called Soufflé Cheesecake or Cotton Cheesecake, is famous for its light, airy, melt-in-the-mouth texture. Unlike traditional dense cheesecakes, this Japanese version combines elements of chiffon cake and cheesecake, resulting in a dessert that’s creamy yet cloud-like. It wobbles slightly when baked, looks elegant, and tastes delicately sweet — making it a favorite for cheesecake lovers worldwide.
A Little History
The Japanese Cheesecake was first popularized in Japan during the 1980s, when Western desserts started gaining popularity. A Japanese chef, inspired by the classic European cheesecake, created a lighter version that suited local tastes by whipping egg whites separately and folding them into the batter. Since then, it has become an iconic Japanese dessert, often served in bakeries across Japan and now beloved internationally.
Ingredients
For the Cheesecake Batter:
- 8 oz (225g) cream cheese, softened
- ½ cup (120ml) whole milk
- ¼ cup (60g) unsalted butter
- 6 large eggs, separated
- ¾ cup (150g) sugar (divided)
- ½ cup (60g) cake flour (sifted)
- 2 tbsp (20g) cornstarch
- 1 tsp vanilla extract
- 1 tsp lemon juice
- Pinch of salt
For Baking Setup:
- Hot water (for water bath)
- Parchment paper (for lining the pan)
Instructions & Methods
Step 1: Prepare the Pan
- Line the bottom and sides of a 9-inch round springform pan with parchment paper.
- Wrap the outside of the pan with foil to prevent water from seeping in during the water bath.
Step 2: Melt & Mix Base
- In a heatproof bowl over a double boiler, melt the cream cheese, butter, and milk until smooth.
- Remove from heat, let cool slightly, then whisk in egg yolks, vanilla, lemon juice, and sifted flour + cornstarch. Mix until silky.
Step 3: Whip the Egg Whites
- In a clean, grease-free bowl, beat egg whites with a pinch of salt until foamy.
- Gradually add sugar and whip until glossy, soft-to-medium peaks form.
Step 4: Fold Batter
- Gently fold the egg white meringue into the cream cheese mixture, one-third at a time, using a spatula. Be careful not to deflate the airy texture.
Step 5: Bake in Water Bath
- Pour batter into the prepared pan. Tap gently to release air bubbles.
- Place the cake pan inside a larger roasting pan, then pour hot water into the outer pan until it reaches halfway up the sides of the cake pan.
- Bake at 320°F (160°C) for 25 minutes, then reduce heat to 300°F (150°C) and bake for another 40–45 minutes, until the top is golden and set.
Step 6: Cooling & Formation
- Turn off the oven, crack the door slightly, and let the cheesecake rest inside for 15 minutes to prevent collapse.
- Remove from oven and water bath, cool completely on a wire rack, then transfer to the fridge for at least 4 hours before serving.
Formation & Presentation
- Once chilled, gently release the springform pan and peel off the parchment paper.
- Dust with powdered sugar or decorate with fresh berries for an elegant finish.
- Slice with a warm knife for perfectly clean cuts.
Conclusion
Fluffy Japanese Cheesecake is not just a dessert — it’s an experience. Each bite is soft, jiggly, and melts instantly on the tongue. It bridges cultures, combining the richness of Western cheesecakes with the delicate artistry of Japanese baking.
For Lovers ❤️
- Cheesecake lovers will adore its lighter texture compared to dense New York cheesecake.
- Soufflé lovers will enjoy its airy bounce.
- Those who think “cheesecake is too heavy” will fall in love with this cloud-like version.
Would you like me to also make you a short social-media style caption for this recipe (like the ones you’ve been posting with “Full Recipe in first c.o.m.m.e.n.t 👇👇💬”)? That way you can use both versions.