Christmas Cherry Cheesecake Bars
Christmas Cherry Cheesecake Bars are one of the most festive, nostalgic, and crowd-pleasing desserts you can make during the holiday season.
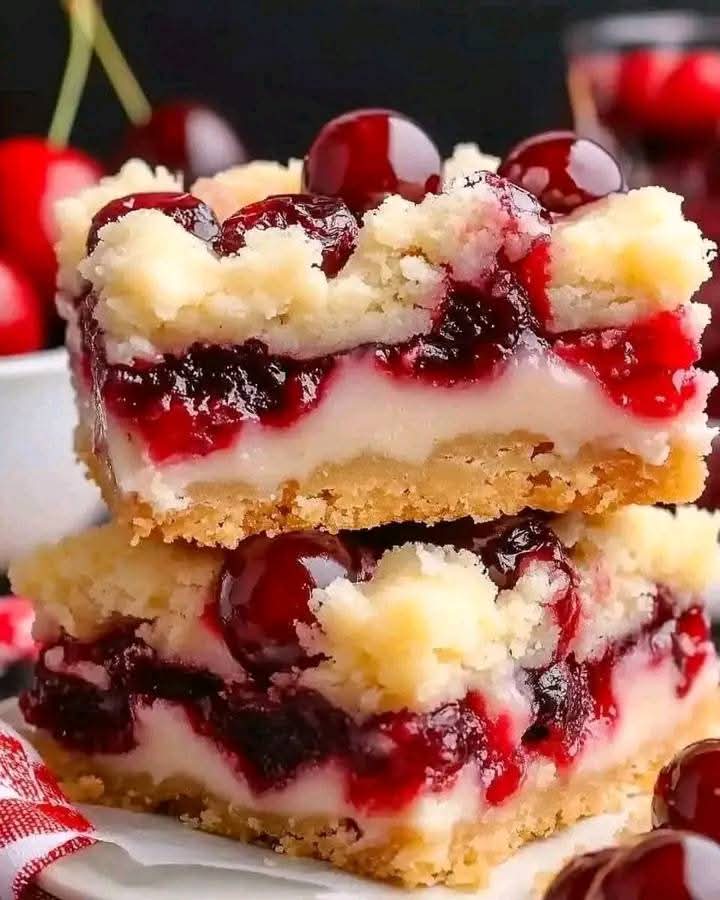
With a buttery cookie crust, a rich and creamy cheesecake layer, and a glossy cherry topping, these bars deliver all the joy of a classic cherry cheesecake—without the hassle of a full cheesecake.
Soft, sweet, creamy, and beautifully colorful, this dessert is perfect for Christmas gatherings, potlucks, cookie trays, and cozy nights at home by the tree. These bars slice like a dream, travel well, and taste even better the next day.
Ingredients
For the Crust:
- 8.5 oz sugar cookie mix
- 4 tbsp cold unsalted butter, cubed
- 1 tbsp cold water (only if needed)
For the Cheesecake Layer:
- 16 oz cream cheese, softened
- 1/2 cup granulated sugar
- 2 large eggs
- 1 1/2 tsp vanilla extract
For the Cherry Topping:
- 1 (21 oz) can cherry pie filling
- Optional: 1/2 tsp almond extract for extra flavor
Step-by-Step Instructions
Step 1: Preheat the Oven
Preheat your oven to 350°F (175°C). Grease or line an 8×8 or 9×9 baking pan with parchment paper, leaving some overhang. This will make it easy to lift the bars out later.
Step 2: Make the Cookie Crust
In a medium bowl, pour in the sugar cookie mix. Add the cold cubed butter. Use a pastry cutter or your fingertips to blend until the mixture becomes crumbly, similar to wet sand. If the dough feels too dry, add 1 tablespoon of cold water.
Press the mixture firmly and evenly into the bottom of your prepared pan. Make sure the crust is compact so it bakes evenly.
Bake the crust for 10 minutes. Remove from the oven and set aside while preparing the cheesecake filling.
Step 3: Prepare the Cheesecake Layer
In a large mixing bowl, beat the softened cream cheese until smooth and creamy. Add the sugar and continue mixing until fully combined.
Add the eggs, one at a time, mixing just until incorporated. Finally, mix in the vanilla extract. Be careful not to overmix—this ensures a silky, crack-free cheesecake layer.
Step 4: Layer the Cheesecake Filling
Pour the cheesecake mixture over the partially baked crust. Use a spatula to spread it evenly from edge to edge.
Step 5: Bake the Bars
Place the pan back into the oven and bake for 28–32 minutes, or until the center is set and no longer jiggly. The bars may puff slightly but will settle as they cool.
Remove from the oven and allow to cool at room temperature for about 30–40 minutes.
Step 6: Add the Cherry Topping
Once the bars are warm (not hot), gently spoon the cherry pie filling over the top. If you want an extra holiday flavor boost, stir in ½ teaspoon almond extract before spooning.
Spread the topping evenly so every slice gets plenty of cherry goodness.
Step 7: Chill Completely
Cover the bars and refrigerate them for at least 4 hours, or preferably overnight. This step helps the cheesecake layer set into a velvety texture and makes slicing easier.
Step 8: Slice and Serve
Use the parchment overhang to lift the dessert from the pan. Slice into neat squares or bars. Serve chilled for the best flavor and texture.
Tips for Perfect Christmas Cheesecake Bars
- Use room-temperature cream cheese for a smooth filling.
- Don’t overbake — slight jiggle is good!
- Add festive touches like white chocolate drizzle or holiday sprinkles.
- These bars taste even better after chilling overnight.
Why You’ll Love This Recipe
- Creamy cheesecake without the hassle of a full cheesecake
- Perfectly balanced sweetness
- Holiday-ready flavors and colors
- Easy to make ahead
- Great for gifting or sharing
These Christmas Cherry Cheesecake Bars are guaranteed to disappear fast—so consider making a double batch!
Enjoy, and happy holidays!