Iowa Party Bites
Part 1 — Introduction & Why You’ll Love Them
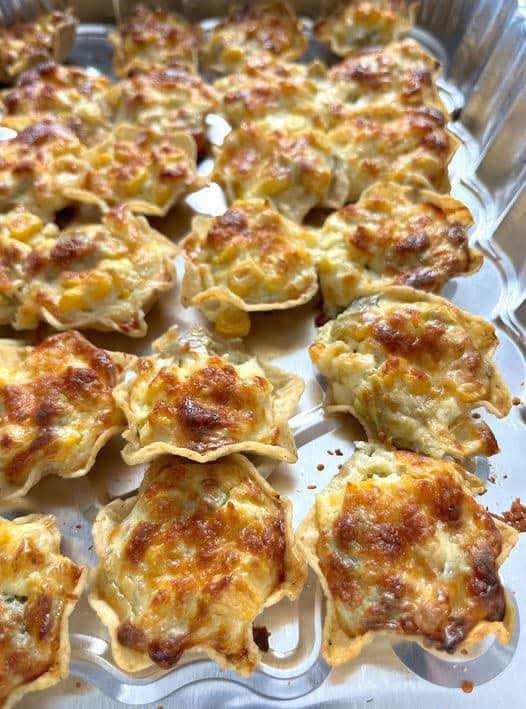
Why these work: Tostitos Scoops (or any sturdy tortilla chip cup) hold a rich, creamy filling without falling apart. The combination of cream cheese + mozzarella gives a smooth, melty base, while sweet corn and green chiles add texture and mild brightness. They bake quickly, can be prepared ahead, and travel well to potlucks.
Tip: If you want to post this as a multi-page blog series, use the anchor links below to split posts and keep readers clicking “Next” for more.
Part 2 — Ingredients
Gather everything before you begin. Quantities below make about 40–48 filled chips depending on how generously you spoon the filling.
- 1 (10 oz) bag Tostitos Scoops (or similar scoop-shaped tortilla chips)
- 1 (8 oz) block cream cheese, softened
- 8 oz shredded mozzarella cheese
- 1 large egg
- 1 (15 oz) can sweet corn, drained
- 1 (4 oz) can mild or medium green chiles, drained
- 1 tsp garlic powder
- 1 tsp salt
- ½ tsp black pepper
- ½ cup grated Parmesan cheese (for topping)
Ingredient notes: Use full-fat cream cheese for best texture and melt. If you prefer extra heat, swap the green chiles for diced jalapeños or add ¼–½ tsp crushed red pepper.
Part 3 — Instructions (Step-by-step)
- Preheat the oven: Set your oven to 425°F (218°C). Line two baking sheets with parchment or lightly grease them.
- Arrange the chips: Place Tostitos Scoops cup side up in close rows so they support each other during baking.
- Make the filling: In a large mixing bowl, add the softened cream cheese and mozzarella. Add the egg, drained sweet corn, drained green chiles, garlic powder, salt, and black pepper. Stir until the mixture is smooth and evenly combined. (A hand mixer or spatula works well.)
- Fill the chips: Using a small spoon or cookie scoop, place approximately 1 tablespoon of filling into each tortilla cup. Do not overfill — leave a little room for the filling to bubble and settle.
- Top with Parmesan: Sprinkle grated Parmesan generously over each filled chip for a golden, savory crust.
- Bake: Bake for 13–15 minutes, or until the filling is hot and bubbly and the Parmesan turns lightly golden. If you want extra browning, broil for 1–2 minutes — watch closely so they don’t burn.
- Serve: Let the bites cool slightly for 2–3 minutes on the sheet, then transfer to a serving platter. Best served warm.
Part 4 — Pro Tips, Variations & FAQ
Pro Tips
- Softening cream cheese: Remove from fridge 30–60 minutes ahead, or microwave the wrapped block for 8–10 seconds to take the chill off.
- Make-ahead: Fill the chips and cover the baking sheet tightly with plastic wrap; refrigerate up to 24 hours. Bake just before serving.
- Even baking: Place filled chips closely together so they support one another — this prevents them tipping during baking.
- Portion control: Use a small cookie scoop (~1 tablespoon) for uniform bites and consistent bake time.
Variations
- Mexican-style: Add ½ cup shredded pepper jack or cheddar and 1 tsp cumin. Top with chopped cilantro and a squeeze of lime.
- BBQ corn & bacon: Mix in ¼ cup finely chopped crisp bacon and 2 tbsp BBQ sauce. Top with chopped green onions.
- Vegetarian deluxe: Add ¼ cup finely diced red bell pepper and 2 tbsp chopped green onion for color.
- Cheesy herb: Fold in 1 tbsp chopped fresh parsley and 1 tsp dried oregano into the filling.
FAQ
Q: Can I use other chips?
A: Use scoop-style chips that have a deep cup. Thin tortilla chips often break under the weight of the filling.
Q: How long do leftovers keep?
A: Store in an airtight container in the refrigerator for up to 2 days. Reheat in a 350°F (175°C) oven for 6–8 minutes to crisp them back up.
Q: Can these be frozen?
A: You can freeze filled but unbaked chips on a tray until solid, then transfer to a freezer bag. Bake from frozen, adding a few extra minutes to the baking time. Texture may change slightly.
Printable Recipe Card
Yield: ~40–48 bites
Prep time: 10–15 minutes • Cook time: 13–15 minutes • Total: 25–35 minutes
Ingredients (brief)
- 10 oz Tostitos Scoops
- 8 oz cream cheese
- 8 oz shredded mozzarella
- 1 large egg
- 15 oz can sweet corn, drained
- 4 oz can green chiles, drained
- 1 tsp garlic powder, 1 tsp salt, ½ tsp pepper
- ½ cup grated Parmesan
Directions (brief)
- Preheat oven to 425°F (218°C). Arrange chips on sheets.
- Mix cream cheese, mozzarella, egg, corn, chiles, and seasonings.
- Spoon ~1 Tbsp filling into each chip; top with Parmesan.
- Bake 13–15 minutes until bubbly; cool 2–3 minutes and serve warm.
If you want this split into separate Blogger posts automatically, copy each <section id="partX">...</section> to a new post and keep the anchor links pointing to the next part’s relative URL.